Learn Leather Wrapping

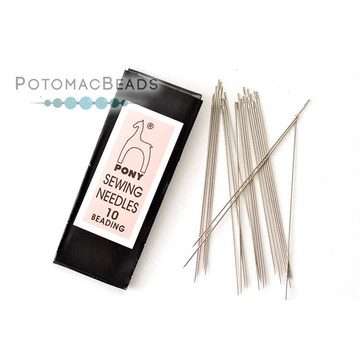
Discover the rustic elegance of leather-wrapped bracelets—a technique that combines rugged charm with intricate detail. These versatile accessories are crafted using leather cording, a needle and thread, beads, and a button clasp, resulting in a piece that's as durable as it is stylish. Whether you’re creating a single-wrap bracelet or a statement piece that loops around your wrist multiple times, this method allows for endless customization. Choose beads that reflect your personal style, from earthy gemstones to sparkling crystals.

On this page, we’ll guide you through the essentials of leather-wrapped bracelet making, with detailed instructions for crafting a single-wrap bracelet to get you started. Looking for more inspiration? Check out our additional project links for multi-wrap designs and advanced patterns. Whether you’re creating for yourself or someone special, leather-wrapped bracelets offer a unique way to showcase your creativity and craftsmanship. Let’s get wrapping!

Single Strand Pearl Bracelet

Supplies for a Leather Wrap Bracelet

The first step in starting a new jewelry project is to gather your supplies! For a basic Leather Wrap Bracelet, you will need, some 11/0 Beads, Tublet Beads (or Any Single Hole Bead), Beading Thread, Button Clasp, Round Greek Leather, and Size 10 Beading Needle.

Instructions for Basic Leather Wrapping

Step 1: Cut the Leather and Attach Button and Thread

Cut a length of leather cord to 24 inches, thread the leather cord onto the center of the cord and tie an overhand knot just under the button.  This will leave you with a button tied at one end and two 12 inch lengths of the leather cord.

Next, thread a needle onto a 4.5 foot length of beading thread.  Take the end of the thread (opposite the needle) and tie it using a double knot around the leather cord just under the leather knot.  If you want, you can also tie the thread around the leather once more and tie the knot. 

Step 2: Start adding 11/0 Seed Beads

Pick up one 11/0 with your needle and lay it between the leather cords.  Go over the top and over of one strand of leather cord, then under that cord and sew back through the 11/0 you just added.  Take the thread up and over the second strand of leather cord, then under and back through the same 11/0 bead.  

Picture of threading instructions
Step 3:  Add Second Row of Seed Beads

Take the thread over the top, around, and back underneath the first strand of leather cord and add two 11/0s. Next, take the thread over the top, and back underneath the bottom leather cord and back through the two 11/0s you just added. To finish the row, go over the top of your top leather again, around, continue underneath, and sew back through the two 11/0s. Note: You will pass through the two 11/0s three times.

Picture of threading instructions
Step 4: Add Third and Final Row of Seed Beads

Take the thread over the top and around the bottom leather cord and pick up three 11/0 beads.  Take the thread over the top and around the top leather cord and sew back through the three 11/0s you just added.  To finish the row, take the thread over the top and around the bottom leather cord and pass back through the three 11/0s you just added.

Picture of threading instructions
Step 5: Add the First Tubelet Bead

Once again, take the thread up over and around the top leather cord, and add one Tubelet bead.  Take the thread up over and around the bottom leather cord and pass through the Tubelet bead again.  To finish the row, take the thread over the top and around the top leather strand again and back through the same Tubelet bead.  

Continue adding Tubelet beads in this way until you reach the desired length of your bracelet.  Note: While you are doing this, make sure that your beads don't sit too close together and that your leather cords are remaining straight.

Picture of threading instructions
Step 6: Tie Off the Ends to Finish

When you come to the desired length of your bracelet, repeat steps 4, 3, and then 2.  Tie an overhand knot with the leather cording.  If you'd like, you can end your thread by tying it inside of the leather knot.  Leave enough space after the knot so that your button can fit through, and then make a second overhand knot.  Trim the tails of the leather as needed.

Follow Along with a Video Tutorial

Do you prefer to learn by watching?  Follow along with Allie has she provides detailed instructions on how to make this simple leather wrap bracelet using Tubelet beads.  She will highlight the necessary tools and supplies you will need as well as step by step instructions for the project. 

Become a Better Beader!

The Better Beader episodes from Potomac Bead Company are your go-to resource for mastering beading stitches and choosing the right materials for your projects. Explore essential beading stitch patterns like peyote, herringbone, and brick stitch, while learning how to select the best threads for strength and flexibility.

These episodes also offer expert tips on threading needles, determining how much thread to use, and replacing worn tools. Whether you’re a beginner or an experienced beader, Better Beader provides practical techniques and creative solutions to help you perfect your craft. Start your journey today!

Search our full line of products

Jewelry Making Tips and Tricks

Practice Basic Techniques

Start with simple projects to practice basic techniques before moving on to more complex designs.

Experiment with Color and Texture

Jewelry is a great way to express your personal style, so don’t be afraid to experiment with different colors, textures, and materials. Check out this excellent blog entry to help guide you in choosing colors - 6 Color Theory Tips to Enhance Your Beading Designs!

Stay Organized

Keep your workspace organized by using a bead mat or tray to keep your beads from rolling away and keeping your tools within reach.

Plan Your Design

Before you start creating your jewelry, sketch out your design and gather your materials. This will help you stay organized and ensure you have all the materials you need.

Take Breaks

Jewelry making can be time-consuming and requires a lot of focus. Take frequent breaks to avoid eye strain and hand fatigue.

Don't Be Afraid to Make Mistakes

Making mistakes is part of the learning process. If you make a mistake, don’t be discouraged, take it as an opportunity to learn and improve your skills.

Share Your Creations

Share your creations with others by wearing your jewelry, giving it as gifts, or selling it online. It’s a great way to get feedback and improve your skills.

Blue Bayou SuperDuo

Potomac Bead is host to a Beading and Jewelry making group of over 80 thousand members of all skill levels. Share projects and ideas, get advice and inspiration from fellow artisans, and see what others are making. Creating is better with friends!