
- Jewelry-Making Supplies ▾
Design Jewelry with Confidence!
Seed Beads
Thread, Wire, & Stringing Materials
Athenacast Findings & Components
Everything Else
- Kits & Collections ▾
Assemble Your World
Kits & Collections
- Subscriptions ▾
Want monthly Beading Happiness?
Subscriptions
- Learn to Make ▾
Want to learn more?
- Discounts & Deals ▾
Explore Today's Promotions!
-
Seed Beads
Thread, Wire, & Stringing Materials
Findings & Components
Everything Else
-
Kits & Collections
-
Subscriptions
- Home
- How to Make Jewelry
- Better Beader Episodes
- Galvanized Seed Beads and Metal …
Galvanized Seed Beads and Metal Allergies

Watch the Video Tutorial
Watch the Video Tutorial
Need Any Extra Materials?
Need Any Extra Materials?
Need Any Extra Materials?
Need Any Extra Materials?


Episode Transcript
Episode Transcript
Introduction
Galvanized seed beads add a stunning metallic touch to any jewelry design, elevating the elegance and visual appeal of the piece. In this article, we'll provide a step-by-step guide based on the Better Beader episode from Potomac Beads, discussing the use of galvanized seed beads and addressing concerns about metal allergies.
Materials Needed
- Galvanized seed beads (Miyuki or Toho brands recommended)
- Glass seed beads in complementary colors
- Beading thread (e.g., Fireline, Wildfire)
- Beading needle (size 10 or 12)
- Scissors
- Clasp of your choice
Step-by-Step Tutorial
- Begin by threading your beading needle with a comfortable length of beading thread. Tie a knot at the end, leaving a small tail.
- Pick up your galvanized seed beads and glass seed beads in the desired pattern, following the specific design instructions for your chosen project.
- Continue stitching the beads together, ensuring that the tension remains consistent throughout the piece.
- When you reach the end of the row or section, secure the thread by tying off with a few half-hitch knots.
- Repeat the process, building your design according to the pattern or your creative vision.
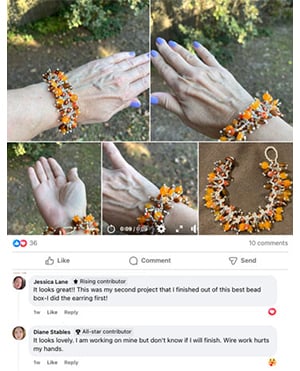
- As you work, be mindful of the placement of the galvanized seed beads, considering how they will sit against the skin if creating a bracelet or necklace.
- Once you've completed the beadwork, attach your chosen clasp using the appropriate beading technique (e.g., peyote stitch, brick stitch) or crimp beads and jump rings.
- Trim any excess thread, ensuring that the knots are secure and the ends are tucked in neatly.
Customization Ideas & Inspiration
Galvanized seed beads come in a variety of colors, from classic gold and silver to vibrant hues like magenta, seafoam, and rose gold. Experiment with different color combinations to create unique designs that reflect your personal style.
Consider incorporating other bead types, such as crystals, pearls, or gemstones, to add texture and dimension to your piece. You can also play with different beading techniques, like herringbone stitch or right-angle weave, to create more intricate patterns.
Addressing Metal Allergies
For those with metal allergies, it's important to note that galvanized seed beads are glass beads coated with a metallic finish. Miyuki and Toho, two reputable Japanese seed bead brands, apply a clear coating (Duracoat or Permafinish) over the metallic layer to minimize direct contact with the skin.
When designing jewelry for someone with metal sensitivities, consider the following tips:
- Use galvanized seed beads in areas that have minimal contact with the skin, such as earrings or pendants.
- For bracelets, opt for larger glass beads or spacers between the galvanized beads to reduce direct skin contact.
- If you or the recipient are highly sensitive, you can apply an additional clear protective coating, like Permalac, over the finished piece for added protection.
Conclusion
Creating stunning jewelry with galvanized seed beads is a fun and rewarding experience. By following the steps outlined in this tutorial and keeping the helpful tips in mind, you'll be able to confidently incorporate these beautiful metallic beads into your designs.
Remember to consider the placement of the galvanized beads and take appropriate precautions if you or the recipient have metal allergies. With a little creativity and care, you can create unique, eye-catching pieces that showcase the beauty of galvanized seed beads.
For more inspiration and ideas, be sure to check out other Better Beader episodes from Potomac Beads. Happy beading!
Join Our Growing Community
Join Our Growing Community


Our Testimonials
Our Testimonials
Only Visible on Admin Mode
Item Description
Designer's Material List
Project Steps
Consider Allergies: Know how metal coatings might affect people with allergies.
Choose Quality Beads: Select beads with Duracoat or Permafinish coatings.
Design Thoughtfully: Create pieces that minimize direct contact with metal-coated beads.
Use Protective Coatings: Apply additional coatings like Permalac if necessary.
Test for Allergies: If creating for others, conduct allergy tests with less sensitive body parts.
Highest Quality
Products
100% Money
Back Guarantee
Fast
Shipping
Best Teaching &
Customer Service
You'll want these emails...
Get Free Projects & Inspiration
Get Free Projects & Inspiration
- Bullet 1
- Bullet 2
- Bullet 3

240 N Prospect St. Hagerstown, MD 21740

(301) 393-4667

hello@potomacbeads.com


Copyright © PotomacBeads